

This bathroom renovation was about a year in the making. I just don’t know where to find the time for all this!
In any event, it happened, and I’ve documented the work from start to finish.
My wife and I are both very pleased with the results, although as it always does – this took about twice as long as we had hoped!
Do you know what the most important part of a good “before and after” is?
The before.
Otherwise, you have nothing to compare it to!
Sometimes I feel like my life is a series of post-it notes. And sadly, I walked right by the post-it note that said “photo of bathroom” the morning we started this renovation.
I’ve looked through my files, and I don’t have a photo of the bathroom.
But I do have the video I posted from the time my shower door spotaneously combusted.
You might have seen the video before, and if not, then it’s just a little something else to add to this post!
But consider this video the “before” for the renovation, and make note of the awful builder-grade shower tile and floor:
That’s the worst tile I’ve ever seen.
Wait, it’s not.
The tile that was in the ensuite bathroom when we bought in 2010 was the worst:
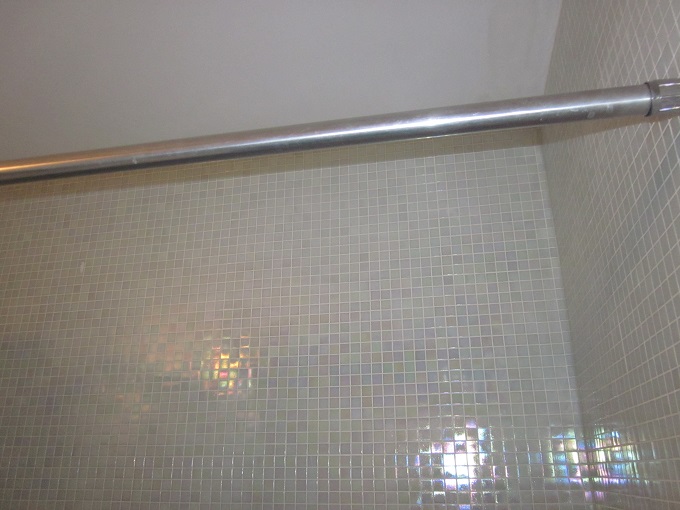
But the brown and beige combo is a close second.
So with the “before” photo out of the way, here’s how the work progressed each day:
DAY ONE:
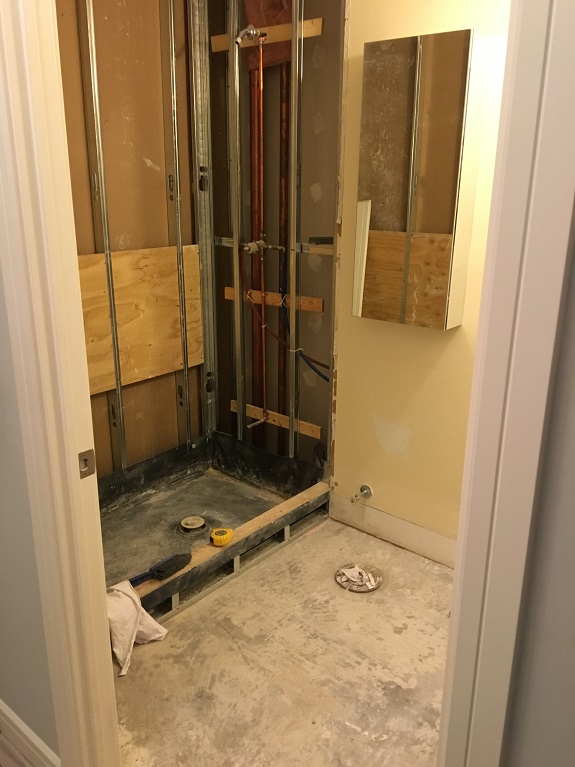
Today was the “demo day.”
I was shocked at what it looked like when I got home.
Work Completed
-removal and disposal of vanity
-removal and disposal of cheap affixed-to-the-wall builder-grade mirror
-removal and storage of toilet
-removal and disposal of floor tile
-removal and disposal of shower floor tile
-removal and disposal of shower wall tile
–
DAY TWO:
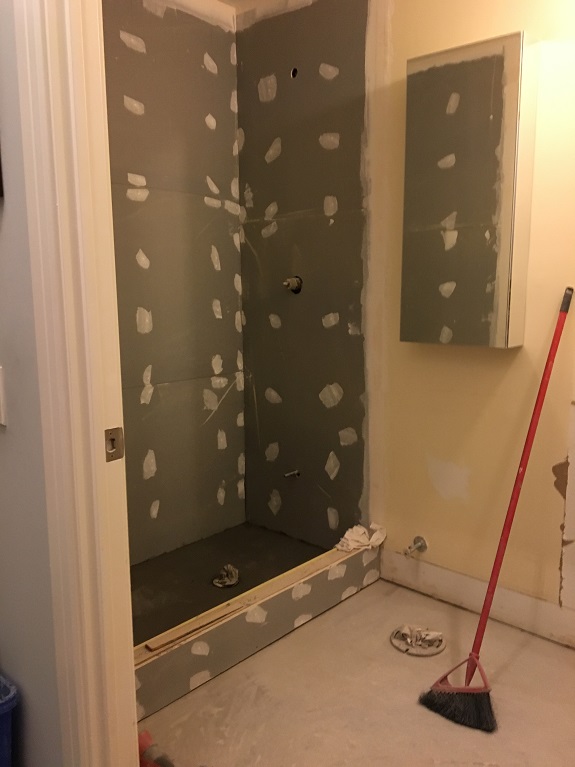
Not as big an effect today, but smoothing out that floor isn’t easy!
Work Completed
-grinding of bathroom floor (what a mess!)
-installation of shower drywall
-installation of shower base (sub-tile)
-installation of shower curb
–
DAY THREE:
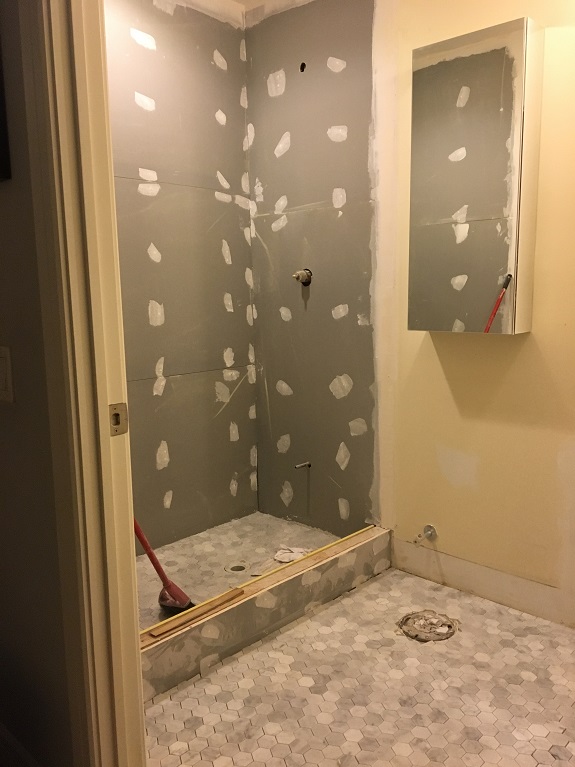
Today we finally got to see what that sexy, hexagonal marble floor tile looks like!
I loved it.
Jenna loved it.
Bella loved it.
Well, we don’t know that for sure, but I can only assume…
Work Completed
-installation of floor tile
-installation of shower floor tile
-patching and sanding of holes left from awful builder-grade shower mirror (can’t see in photo), and other marks on wall
–
DAY FOUR:
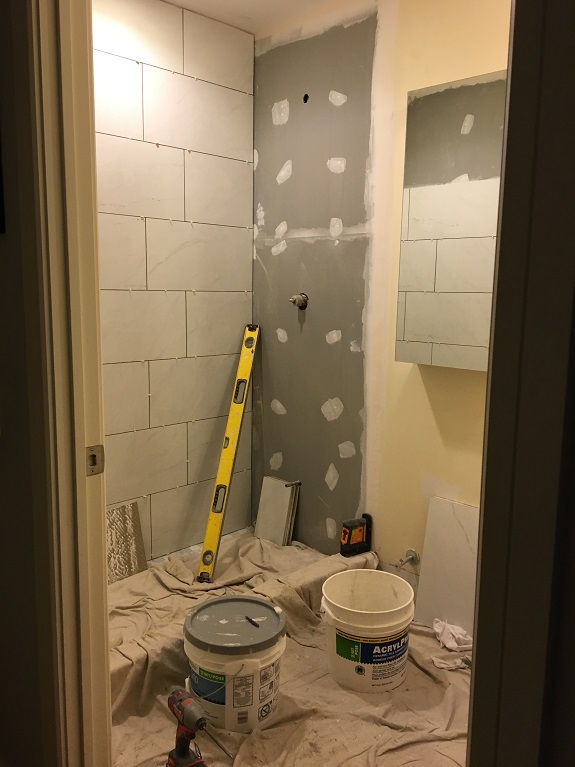
Okay so the floor tile is covered up with the tarps, but you saw that on Day Three
Today was about getting that shower tile up, and I’m pretty happy with how it looks!
Work Completed
-Installation of 60% of shower tile
–
DAY FIVE:
After day one, I was really excited about this maybe being a “quick” bathroom renovation.
But that was just demolition.
The work to be completed is constantly delayed by things drying, or setting.
It looks like we’re heading into week two, which means I have to share a bathroom with my wife through the weekend…
Work Completed
-installation of remaining 40% of shower tile
-installation of shower tile on curb
-grouting of bathroom floor tile and bathroom shower tile
–
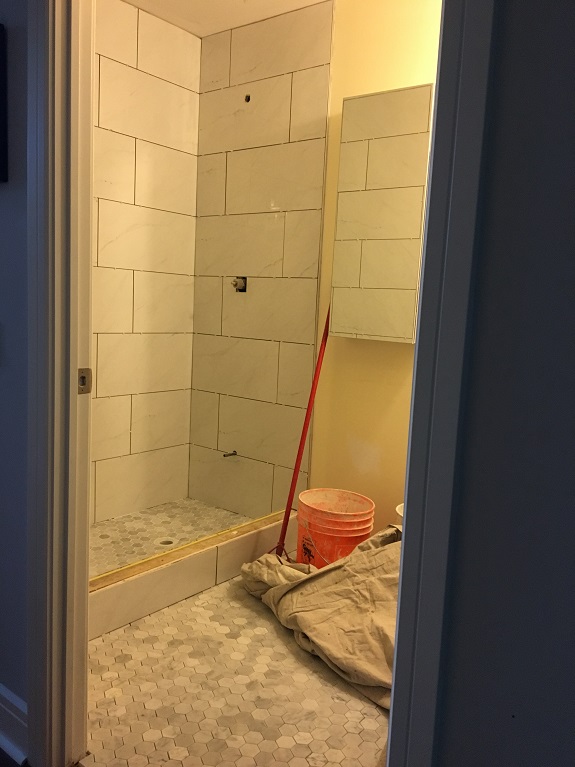
DAY SIX:
Work Completed:
-grouting of shower tile
-installation of bathroom vanity
-painting of all walls & ceiling
-installation of marble slab on curb
–
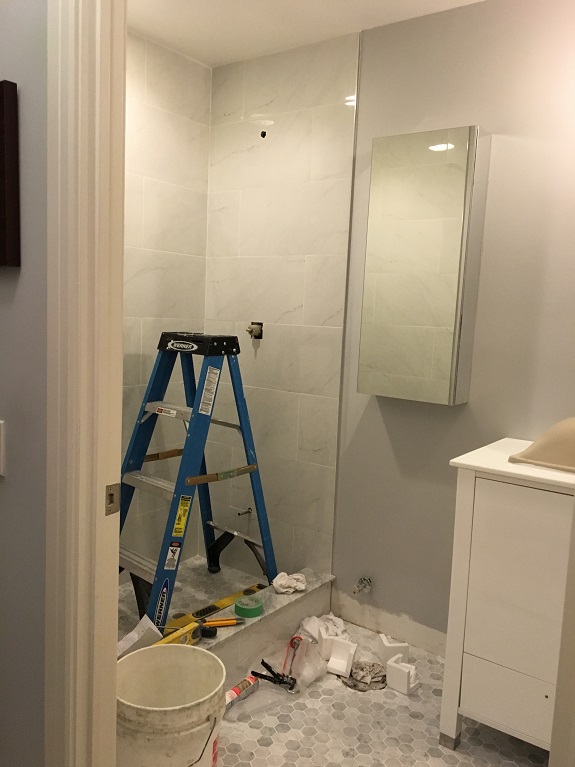
DAY SEVEN:
Photos don’t do it justice – so here’s a video:
Work Completed
-installation of glass pane and glass shower door
-installation of toilet
-installation of bathroom sink and faucet
-installation of trimi
-installation of shower-head, dial, and spout
–
So there you have it!
Now on to our second bathroom.
Fun times in the Fleming household!


moonbeam!
at 7:37 am
Looks beautiful! and I’m glad you and Jenna are happy with it! and as you said, it was not the worst & longest renovation nightmare that some people endure! Happy showers! 🙂
IanC
at 8:41 am
Did they seal the marble tiles before grouting? Did they also seal the also the grout? Contractors may say the sealer is mixed in the grout (may not be always true or effectively done). You can tell if the grout is sealed with a water bottle sprayer and seeing if the grout darkens or changes colour. Most people advise to seal your grout (Mike Holmes is the exception). For a bathroom floor, I don’t know who wouldn’t want their grout sealed – otherwise dribbles, drips, and drops soak through the grout. Sealing grout is an easy do-it-yourself task and pretty cheap too. Same with sealing tiles. And oh yeah, very nice bathroom !
Kyle
at 9:08 am
Looks great David! One tip: most shower faucet manufacturers use the same thermostatic pressure balanced shower valve (i.e. the part in the wall, that would have required a plumber to replace) across many models in their line up. The different models, just have a different handle or cover plate. If you’re going to TAPS or another retailer to change your sink faucet, you can probably bring the model number or a picture of your shower faucet. Based on the valve that your model uses, they may be able to suggest other models where you can interchange the handle and cover plate to something that better matches the shower head.
Westender
at 9:14 am
Looks good David! We chose the same marble floor tile for our bathroom (and shower floor) and I love it. The lighter colours you’ve chosen make the bathroom look much larger from the brown/beige combo.
formerly Frosty
at 11:25 am
Looking good!
Cool Koshur
at 12:42 pm
@David
This looks good. You are keen observer. You had a valid point about sink faucet being just close to edge and water getting spilled on counter top.
As far as faucet in shower is concerned, I would like to see volume control build into them. It allows you to control the follow of water. Typically American standard model have it. This not only saves lot of water but are easier to use as well. This is pretty common in US. But our Canadian shower faucets miss this key feature
Johnny Rotten
at 9:06 am
You said it was a year in the making but your pics say it took 6 days? what really happened?
David Fleming
at 2:52 pm
@ Johnny Rotten
Sorry for the confusion – I meant a year in the making, as in that’s how long it took to get our act together.
We started with the idea to replace the vanities.
Once we started looking, we got other ideas.
We were told by our contractor if we ever wanted to replace the floors, it’s a lot easier to do when we’re taking up the vanity.
But once we picked floor tile, the shower tile made no sense.
And if we were going to do one bathroom, we should do them both.
Then the shower-heads…
Then the faucets…
To be quite honest – we’ve been talking about replacing the vanities for YEARS.
I did a video on the stupid sink back in 2013:
https://www.youtube.com/watch?v=EcQg6FZs9Z8
Johynny Rotten
at 12:36 pm
Awesome Dave. Thank you. You know what also would be really helpful? If we know how much this cost. I little private but if you can share a breakdown of the costs (or just total) that would be great, Many people, especially agents, just throw number out there. Is this a $10K reno? $15K? or $20K?. And also, what approvals did you need from the condo board?
I’m starting to see a few condo flips now. Inevitable I guess, but i’m curious to know if the condo board puts you through the ringer on a renovation or if its actually pretty straightforward?
Tommy
at 1:46 am
I’m surprised you used drywall instead of cement board. Drywall gets soggy with any small water seepage, while cement board lasts forever.